Showing posts with label Chicken and Mutton. Show all posts

ummm...SHAMMI KABABS (CRISP MINCEMEAT PATTIES)

shammi kebab1.JPG


After 9 days of fasting during Navratra's it's time to indulge...though the food that is eaten during that time does have a delicious charm of it's own, crisp potato tikkis, wafers and kuttu atta pakodas! No wonder the kilo's just keep piling up :)


Shammi kabab's are the hottest and most demanded snack/finger food in my house, these delicious mince meat patties, soft and meltingly tender on the inside and crisp on the outside are a sure shot hit at all parties.For these make sure that mincemeat from hind leg is used and is run through the mincing machine twice, for the outer coating I use fresh bread crumbs, that is fresh bread run in the coffee grinder to yield soft, sticky breadcrumbs. To make these you require-


  • Mince meat-1/2 kg

  • Horsegram lentils(chana dal)-1/2 cup

  • Ginger -1 tbsp ground+1 tbsp chopped fresh

  • Garlic-1/2 tbsp ground

  • Green chillies-2 chopped fine

  • Coriander- 1 bunch, chopped

  • Onion-1 large, chopped finely

  • Garam masala-1 tbsp

  • Oil for shallow frying

  • Bread slices-3


Place mincemeat, washed dal, ginger+garlic in a pressure cooker, add minimal water to let it cook through without burning, about 1/2-3/4 cup, give 5-6 whistles, and let pressure drop by itself.Now here comes in a bit of elbow grease, in a mortar and pestle, pound parts of the cooled mincemeat mixture till smooth, transfer to a large bowl, you can add 1 egg if you feel that it is too firm.Add ground ginger, chillies,coriander, onion, garam masala and salt to taste and mix well, I add all of these to the mixture together whereas my grandma used to stuff each kabab individually, whew! beats me, you can do it if you are inclined to however!, Prepare the crumbs by running bread through the grinder, shape mixture into patties, coat with crumbs and shallow fry in a non stick pan.drain on paper towel before serving.


I normally shape and bread the patties and store them for upto 3-4 days, fry and serve as needed, great as a filling for sandwiches, burgers, pita bread too. I am sure they freeze well too, serve hot with green coriander chutney and tomato ketchup.ummm...

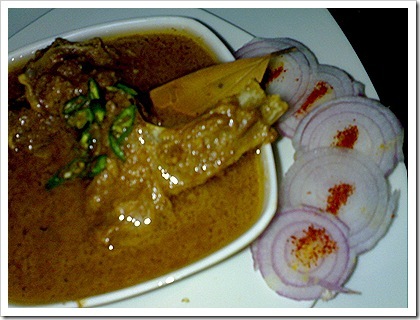
LAJAWAB DAHI-WALA MEAT

LOVE AT SO MANY LEVELS –That’s what I think of when I make this,since this is my hubby's absolute favorite!

Lets go step by step to make this awesome concoction of lamb meat and yoghurt and other ingredients right off your kitchen shelf.

Step 1-EASY:

Ingredients-

  • Onions-2 medium sized, ground.
  • Thick Yoghurt-1 1/2 cup, beaten.
  • Mutton-1/2 Kg.
  • Desi ghee,(clarified butter)-4 Tbsp.
  • Ginger- garlic paste –1 Tbsp.
  • Black Cardamom –1 whole
  • Cloves-3-4
  • Cinnamon-1 inch pc
  • Black pepper-1/2 Tbsp.
  • Bay leaf-1
  • Salt to taste
  • Garam masala-1/2 tsp
  • Green chilli-1 deseeded and sliced

Step 2-EASIER:

Method-

Method: Heat ghee in a heavy bottom karahi, add the ground onions, ginger -garlic paste and brown them very carefully they should be very well browned; this needs constant stirring and vigilance. WARNING –Do not let the onions burn!!!!

Start adding the curd little at a time till all of it is used up. Grind all the spices together except for the bay leaf and add to the gravy along with green chili and whole bay leaf. The gravy should have turned thick by this time giving off a heavenly aroma. Now add washed and dried mutton pieces and continue roasting and stirring on a low flame for another 15 – 20 minutes.

Heat 1 cup of water and add it to the mutton, transfer to a pressure cooker, add salt and give at least 8-9 whistles.

WARNING AGAIN this is sure to attract all those loved ones at home to the kitchen!

Step 3-EASIEST:

VOILA!!

“LAJAWAB DAHI WALA MEAT” is ready. Eat it hot with tandoori parantha or tawa wali roti and of course onion salad.

22092007514 

Lajawab Dahi-wala meat -A truly epicurean experience

Note- This entire post was so beautifully written by my dear sis while I made it and shouted out the recipe to her!, Thanks payal for being such a sweetheart!

Technorati Tags: , ,

BUTTER CHICKEN-my version

butter chicken-my version


When ever one thinks of Indian cuisine ,the one dish that tops the list is BUTTER CHICKEN, don't we all just love it! I remember as kids whenever we had to go out for dinner we would invariably end up ordering butter chicken and nans over any other favorites like chinese or south indian .In North India this one dish simply rules!. The tender smokey flavor of the chicken combined with the rich , delicate and tomatoey gravy make this an irresistible treat.Wish i could get some right now!

Ingredients for the chicken-(serves 6)
  • Chicken-1 kg
  • Thick curd-1 cup
  • garlic paste-1 tbsp.
  • a pinch of red food colour
  • salt according to taste

Method:-

Combine all the above ingredients together and allow to marinate for atleast 2 hrs so that the flavors permeate the chicken. Roast or grill the chicken pieces till done or till juices run clear when pierced. I use my gas tandoor /or sometimes the grill for this purpose.Let little bits and pieces of the chicken burn a little -that imparts the smokey flavor.

Ingredients for the gravy-

  • Onions- 2 medium sized
  • Tomatoes- 5 large
  • Garlic paste -1 tsp
  • Desi ghee- 2 tbsp
  • Cream/butter- for garnishing 1 tbsp each
  • Bay leaves- 2
  • Cloves- 4
  • Cardamom(green)- 2 powdered
  • Garam masala- 1 tbsp
  • sugar- 1/2 tsp
  • cumin-1/tsp
  • pinch of red food colour
  • green chillies-2 slit and deseeded

Method-

Combine chopped tomatoes and onions ,add garlic and all the spices except cumin and boil in pressure cooker ,about 5 whistles .Cool and puree in a blender.Heat desi ghee add cumin , let crackle next add the onion-tomato puree and the food colour and cook for 15-20 mins. add salt to taste, garam masala , green chilli and the chicken ,let the flavors infuse , continue cooking for another 10 mins. garnish with cream/butter before serving,can also add chopped coriander. Serve hot with nans.

RARA GOSHT~ROASTED MUTTON CURRY... PUNJABI STYLE

Rara gosht.JPG


This dhaba inspired mutton curry is a keeper, will be making this over and over again.Gagan loved it so much that he asked for second and third helpings!!.The different thing I did here was to boil the mutton first and then roast it with the masalas.We really enjoyed this lovely curry with tandoori rotis :) and a green salad.


  • Mutton-1/2 kg

  • Onions- 4 large (pureed)

  • Ginger + garlic paste-1 tbsp

  • Tomatoes-2 medium (pureed)

  • Pure desi ghee-2 tbsp

  • Refined oil-4 tbsp

  • Curd-1 cup

  • Garam masala-1 tbsp

  • Cumin seeds-1 tsp

  • Deggi mirch-1 tsp

  • Salt and black pepper to taste

  • add 1 green chilli if you like it hot!


Heat refined oil in a heavy bottom pan, add the onions and cumin seeds and fry till brown now add the ginger+garlic paste and fry again for 2-3 minutes, add tomato puree and fry till masala separates now add the curd and mutton together along with the ghee, garam masala, deggi mirch and salt and pepper, also add 1/2 cup hot water, mix well.Transfer mutton + masala to a pressure cooker and give 8-9 whistles, turn off stove and let pressure drop by itself.Open cooker and check if mutton is done, transfer to the same heavy bottom pan again and roast atleast for 20-30 minutes till dry and browned, serve hot!


rara gosht with tandoori roti.JPG

BEST CHICKEN BIRYANI IN THE WORLD!...WITH PICTORIAL

chicken biryani1.JPG


This is my mother's very famous recipe which she makes only on special occassions but till date she has not given the recipe to anyone, so when I went to see her recently and to tie "rakhi" to my brother she called me to her side and said -"I will not be around for very long but I want to share my special recipe with you and your blog readers so that it lives on forever", I was so touched I had tears in my eyes....Here I am sharing it with you all as per her wishes, along with very detailed step-by-step pictures taken as she made it, do let me know if you make it too so that I can tell her and I AM SURE SHE WOULD BE VERY HAPPY TO KNOW....Ingredients required for making this(serves 10)-


  • Fresh chicken- 2 (approx 700gms each), cut into 8 pcs each

  • Finest basmati you can find- 3 steel glass full OR about 4 and a half cups

  • Onions (sliced)- 7 medium

  • Ginger- 1/2 cup chopped

  • Garlic-1/2 cup chopped

  • Almonds- soaked and peeled, a handful

  • Raisins and cashews- handful

  • Mint- 1 cup chopped

  • Juice of 1 large lemon

  • Saffron -a pinch soaked in milk

  • Pure desi ghee-1/2 cup

  • Garam masala- 3-4 tbsp (freshly ground)

  • Bay leaves-2

  • Butter-50 gms

  • Aniseed powder(saunf)-1 tsp

  • Green chillies- 2 sliced

  • Salt and pepper to taste


onion,ginger and garlic.JPG


Chopped onions, ginger and garlic.


washing basmati rice.JPG


Wash basmati and soak at least 1 hour before.


making stock.JPG


Make the stock-In a pressure cooker take the lesser desired parts of the chicken like neck and all, add a handful of onions alongwith a tbsp each of ginger and garlic as well as some garam masala and bay leaves and give 5-6 whistles, strain and keep stock aside.


frying chicken.JPG


Fry rest of the chicken in desi ghee, till golden brown,drain and keep aside.


frying onions.JPG


In the same ghee fry the onions ,ginger and garlic till golden, drain and keep aside.


nuts and raisins.JPG


Now fry the nuts and raisins in this ghee.


soaking saffron.JPG


Soak saffron in milk.


stock and spices.JPG


Take a heavy bottom pot like the one shown above,OR you can use whatever you have at hand. Bring the stock to a boil, add 2 tbsp garam masala to it, then the drained rice, add salt .Let rice cook covered till almost done.


adding chicken and onions to boiled rice.JPG


Add chicken and onion, ginger garlic fried , dot with butter/ghee.


adding mint.JPG


Add chopped mint, dry fruit and saffron.


squeeze a lemon.JPG


Squeeze lemon juice,add rest of garam masala and saunf powder, adjust seasoning , you can add finely sliced green chillies too.Combine everything well very, very gently so as not to break the rice.


seal pot with dough.JPG


Seal top of pot with some dough, put on "dum" (put in moderate oven or on slow heat for 10-15 minutes).


chicken biryani2.JPG


Though it does take time and effort to make a good biryani, I hope this pictorial will be helpful for first timers as well as for the seasoned cook.The biryani has a FULL-BODIED flavor and is essentially Muslim style biryani, we enjoyed ours with some pomegranate yogurt and a glass of wine.I am really happy to finally have the recipe and that too with such clarity so that my mother's legacy is passed down to future generations and the taste that was in her hand can be revived and remembered for years to come.


Thank you mamma for sharing this precious recipe with us...

KASHMIRI MUTSCH REVISITED ( Meatballs in a Spicy Gravy)

I have been eating mutsch since I was a child, breaking up the oblong meatballs with my hands and mashing them into soft, fluffy rice.( my mom makes the best!).
I have earlier posted the recipe of her mutsch which can be found here, (she makes it the way my father's family have always made it in Kashmir, having learned their ways as a young bride) however I recently came across another recipe of mutsch, probably a purer version at a kashmiri's blog- Anita of A Mad Tea Party, she lists them amongst the 5 things to eat before you die :), and rightly so!
Both me and mom were eager to give it a go, the results were very good, though I am probably more partial to my mom's recipe since I have grown up with it and the addition of yogurt gives the mutsch a delicious tang!
                              Mutsch   (recipe from here) 
         
  • For the meatballs
  • 500gms minced mutton
  • 1 heaped T Kashmiri chilli powder
  • 1 ½ heaped T saunf (fennel) powder
  • 1 t sonth (dry ginger powder)
  • 1 clove of garlic, minced
  • 2 cloves
  • 2 black cardamoms
  • 1 t Kashmiri garam masala ( see note below)
  • salt
  • 3-5 T mustard oil
  • For the gravy
  • 2 cloves
  • 2 black cardamoms
  • 1 bayleaf (Indian ones are 3-4” long)
  • 1 T mustard oil
  • 1 T Kashmiri chilli powder
  • 1 heaped T dhaniya(coriander) powder (optional)
  • 1 heaped t sonth
  • 2 heaped T saunf
To make  the meatballs
Place the ground mutton in a large mortar. Powder the cloves and the black cardamom (keep the outer husk aside) and add to the mince.


And the rest of the ingredients and pound well. Pinch off small portions, and shape into oblongs (I give it a gentle roll between the palms).  Let rest for 20-30 min.

                       I added 3 spoons of oil as stated in the original recipe to keep the mutsch soft
To prepare the gravy:
In a heavy flat bottomed pan heat some oil (1-2 T), when hot add the cloves and the bayleaf, dhaniya, saunf, and sonth powders, as you add the red chilli powder keep a cup of water at hand. Stir quickly to roast/fry the spices and then add water. Add another cup or cup and a half of water. Bring to a boil.


Grind the black cardamoms and add to the pan with the husk from the two used for the meatballs. Turn the heat to medium and carefully and gently lower the oblongs into the pan. Cover and let simmer for 30-40 minutes. The gravy will have reduced by a third and the meat will be done. Sprinkle a half teaspoon of Kashmiri garam masala and mix.Serve with warm steamed rice or paranthas.

If you don’t have Kashmiri garam masala: pound together one black cardamom, half inch piece of cinnamon, and 3 cloves, and use.


OTHER KASHMIRI DELICACIES ON THIS BLOG:


BANJARA GOSHT (MUTTON CURRY~GYPSY STYLE!)

This curry is being cooked in two kitchen's simultaneously mine and mom's, and then we will compare notes, she came across this recipe and hasn't stopped gushing about it ever since!I must say it makes one really rustic lip-smacking delicious curry, and true to it's name requires ingredients that you would find anywhere and everywhere, truly gypsy style!


banjara gosht.JPG


  • Mutton-1/2 kg

  • Onions- 3 large (chopped or pureed)

  • Clarified butter(ghee)-4-5 tbsp

  • Fresh, thick Curd- 1/2 cup

  • Red chillies whole-2 or 3 acc. to preference

  • Garam masala-1 tbsp


Boil mutton for 15-20 minutes in 2-3 cups water and keep aside, meanwhile brown onions in the ghee and add the chillies, strain the mutton and reserve stock, add mutton to the browned onions and roast or"bhuno" well(another 15 minutes), keep adding little bit of curd and alternate with the reserved mutton stock, till it is all used up, season with salt.Add about 1-2 cups hot water and cook covered till done, alternately give 7-8 whistles in the pressure cooker, serve hot with rice or bajra rotis.


banjara gosht1.JPG

TENDER GRILLED CHICKEN PITA POCKETS WITH HUMMUS AND GREEN BEANS

Lebanese style recipe- Pita bread with tender, juicy chunks of Chicken, makes for a complete meal and it is healthy to boot! Most of the prep work can be done a day ahead, then all it takes is last minute assembling and you have dinner on the table in minutes.
Ingredients-
  • Pita bread- 4 (sliced in half to make 8 pita ‘pockets’)
  • Boneless chicken- 500 gms (cut up into bite sized pieces)
  • Ginger +garlic paste (fresh)- 1 tbsp
  • Fresh yogurt- 1 cup
  • Fresh French beans- 250 gms ( top and tail)
  • Salt and black pepper to taste
  • Grated cheese, sliced onions, tomatoes and lettuce- acc. to requirement
  • For the Hummus-
  • Boiled chickpeas-1 cup
  • Lemon juice- 2 tbsp
  • Garlic- 2 plump cloves (minced)
  • Tahini- 1 tbsp
  • Olive oil- 2 tbsp
Method-
In a large bowl combine the yogurt and ginger-garlic paste, toss in the Chicken pieces, add salt and pepper and mix to coat evenly.Leave for at least 2 hours.
Pre heat griller and grill the chicken pieces for 20 minutes or till golden, keep warm.
Boil or steam the green beans, sprinkle salt and pepper and keep warm.
For the Hummus-
Combine the Chickpeas, lemon juice, garlic and tahini and blend in a blender, add salt to taste.Dish out in a serving bowl, drizzle olive oil on top.
To assemble and serve-
Lightly roast pita and fill pockets with the tender chicken, lettuce and onions, top with grated cheese and grill for a further 10 minutes till cheese is golden and bubbling.
Serve with the warm beans and Hummus.Enjoy!

CHICKEN~CURRY BACHELOR'S STYLE!

chicken curry.JPG


Last night I was craving some very simple, easy, and no-fuss food, and was totally uninspired as to what I should cook for dinner, had some chicken in the freezer but was really not feeling upto cooking anything elaborate so I just followed my heart and came up with this SIMPLEST of chicken curry's which is so perfect for Bachelors or students, not that I am saying that all you of you out there cannot make it, in fact I feel all of us need a break and want something really quick and easy to rustle up at a moment's notice, in fact these kind of recipes are a favorite with all of us and I am sure even you must be having YOUR favorite too!!, All the ingredients are chopped by hand, since here I am assuming that most student's or bachelors do not own a mixer/grinder and believe me the chunky bits taste delicious!, also the entire recipe involves just one kadhai/frying pan, so there's minimal cleaning up later!!.The simplicity of this chicken curry does in no way compromise on the taste which is so rustic and full-bodied, it makes my mouth water just at the very thought of it :), perfect with plain boiled rice, or hot paranthas.


  • Chicken-1 (about700gms, cut into small pieces)

  • Onions-3 medium (chopped)

  • Tomatoes-3 medium(chopped)

  • Green chillies-2 chopped

  • Oil-1/2 cup

  • Ginger and garlic- 1 tbsp each, chopped

  • Garam masala-1 tbsp

  • Turmeric powder-1/2 tsp.


Heat oil in a large kadhai, add the chicken pieces a few at a time and fry till well browned, now add all the chicken back in the kadhai and toss in the rest of the ingredients except for garam masala, and cover, cook on low flame for 15-20 minutes,stirring every 5 minutes or so, then add some hot water, once oil separates from the masala, lastly season with salt , add garam masala and cook covered for further 5 minutes, serve hot.You can add more water if you want more gravy in the chicken.

KASHMIRI MUTSCH (KOFTAS/MEATBALLS IN A SPICY RED GRAVY)

kashmiri muts.JPG

My mom called up today at work to say she had made kasmiri "mutsch", my mouth started watering at the very thought and on my way back I bought half a kilo of mincemeat, that's the effect these have over you, they are absolutely the bestest you have ever had, one of those dishes that speak for themselves and all the flavors literally shine through...

She learnt this recipe from a renowned waza in the kitchens of Kashmir about 20 years back.I could regale you with a story about Kashmiri food, but I feel at a loss of words and for once let the pictures do the talking.

  • To make these you require-Mincemeat (mutton)-1/2 kg (PLEASE BE CAREFUL about the quality of mince used, should be from hind leg (raan) and please ask the butcher to put it through the mincing machine thrice, THIS REALLY EFFECTS THE END RESULT)
  • Thick curd-1/2 cup
  • Kashmiri Garam masala-1 tsp(Grind together-Black cardamom(moti elaichi)-1,green cardamom(choti elaichi)-2,dry ginger(sonth)-1 small piece,cinnamon(dalchini)-1 small piece,Aniseed (saunf) -1/4 tsp)
  • Kashmiri red chilli powder-1/2 tsp
  • Cornflour-2-3 tbsp
  • Mustard oil-1/2 cup
  • Salt and black pepper to taste

Using a mortar and pestle, grind the mince breaking down the fibres and turning it into a smoother mince like in the pic below(takes about 15-20 mins)-

kashmiri muts2.JPG

Add half of the garam masala, salt and the cornflour and mix well, heat oil in a large kadhai and let smoke so that the mustard oil is not bitter, turn off heat and let oil cool down a little(although the authentic recipe always calls for mustard oil, if you dislike it , pure desi ghee can be used) shape mince into small oblongs whilst wetting the palms of your hands and drop into the oil, after the last one has been shaped,stir carefully so that they are evenly cooked , now add about 1 cup water carefully with the heat lowered, now the cooking that is going on here is half frying and boiling at the same time, let cook for at least 10 minutes.Now add the kashmiri red chilli powder, the rest of the masala and then start adding the curd, little at a time(about 1 tbsp), till it is used up.Cover and cook for another 15 minutes.Traditionally these are served hot over a bed of freshly boiled rice.

kashmiri muts1.JPG

THAI YELLOW CHICKEN CURRY- Easy step by step recipe

It is after a long hiatus that I am writing this post, but I do promise to be regular from now on, I would also like to thank each one of my readers who have been regularly writing in to me for their queries or suggestions.Please do keep writing in at bindiyasingh7@gmail.com.
Today I made this warm, milky, flavorful Thai curry which is very comforting eaten with freshly boiled basmati or jasmine rice, it scores high on the nutrition scale too and is tasty to boot, so lets get cooking!
Thai yellow curry paste is easily available at all supermarkets and is easily distinguishable from its Red and Green counterparts, using Coconut milk from a tetrapack is so easy and I definitely prefer it over the elbow grease of extracting milk from fresh coconuts.

Ingredients-
  • Boneless Chicken- 500gms
  • Coconut Milk- 200 ml (freshly squeezed from 2 coconuts or packaged)
  • Thai yellow curry paste-50 gms
  • Refined oil-2 tbsp
  • French beans- a handful, top and tail
  • Brinjals(long variety)- 2-3 sliced lengthwise
  • Cauliflower(separate into florets) 1/2 cup
  • Carrots-1/2 cup diced, if desired
  • Cilantro/ Coriander- for garnish
  • Salt and black pepper to season
Method-
  1. Heat oil in a heavy bottom pan and empty the contents of Yellow Curry paste(easily available at all supermarkets).Fry for a minute.
  2. Add the washed Chicken pieces and continue frying on low heat for another 5-8 minutes.
  3. Next tip in the coconut milk and stir well, add salt.
  4. Add the veggies and cover, add 1/2 cup more water if required.
  5. Cook for another 15-20 minutes till the Chicken and veggies are both cooked through, taste and adjust seasoning.
  6. Garnish with cilantro and serve with freshly boiled rice.Enjoy!

CHICKEN PULAO- IN 20 MINUTES!

chicken pulao


If you are craving pulao in a jiffy or unexpected guests drop by, or after a long day at work you want something quick-fix, this is for you!Just remember to boil some rice beforehand, or make use of leftovers from last night's dinner.The pulao is delicious and does not lack anywhere where taste is concerned.Gagan liked it so much that I made it twice in one day, once with leftover rice and then rice especially boiled for this!


  • Fresh Chicken-1 (about 8 boneless pieces)

  • Onions- 2 large, sliced

  • Tomatoes -2 medium, pureed

  • Ginger +garlic paste- 1 tbsp

  • Boiled rice- 4 cups

  • Garam masala- 1 tbsp

  • Cumin seeds- 1 tsp

  • Desi ghee-2 tbsp

  • Refined oil for shallow frying


Method-Fry the chicken pieces in hot oil till brown, this will take 10 minutes on high heat in a large kadhai, drain.In the same oil which should be about 3-4 tbsp add the zeera, ginger+garlic and then the onions fry till brown,add tomatoes and cook another 5-6 minutes till oil separates.In a large saucepan, melt the ghee add the rice, the chicken pieces as well as the fried onions, season with salt and chilli powder, add garam masala and give a good toss, your pulao is ready, serve with raita and sliced onions in vinegar.

HYDERABADI STYLE CHICKEN

hyderabadi style chicken.JPG


Try this chicken curry once and you will never forget the taste, I promise..I have no words to describe how delicious it is...so without further ado, here's the recipe.


  • You would be needing one tandoori chicken prepared this way

  • Onion-1 medium ground

  • Tomatoes-2 pureed

  • Lefover curd masala mixture from Tandoori Chicken


Method-


Fry onion in 2 tbsp of the oil leftover from frying the chicken, in the same pan, after onion turns light brown add the tomato puree and cook for 5-6 minutes now tip in the leftover curd masala mixture, and cook for 15 minutes, add chicken pieces, serve hot with naan or rice, yum!

CHICKEN BUTTER MASALA

chicken butter masala1.JPG


I like chicken and Gagan likes mutton so there is always a tiff there, thus I alternate between both for the sake of peace!, last time I made mutton curry so this time around, chicken was on the cards!


So here people... a really fab chicken curry with the subtle hint of butter to tease your taste buds!...it was really divine with fresh boiled rice and a crunchy green salad, will definitely be making this many times over!


Ingredients-


  • Fresh chicken- 1 cut into 8 pcs

  • Onions-2 large (ground with little or no water in the blender)

  • Ginger+garlic paste-1 tsp each

  • Tomatoes- 2-3 large pureed

  • Garam masala-1 tsp

  • Green chilli-1 sliced

  • Butter- 50 gms

  • Refined oil for shallow frying.

  • Cumin-1/2 tsp

  • Cayenne pepper(deggi mirch)-1/2 tsp


Method-


Fry the chicken a few pieces at a time in the refined oil, keep aside.Take a heavy bottom pan and fry the onion paste in butter on a slow flame till brown add ginger,garlic and the spices and the tomatoes+green chilli, fry for 15-20 minutes till the masala leaves oil as well as sides of the pan, next add about 2 cups water and the chicken pieces, season with salt , cover and cook for atleast 15 minutes more, serve hot.


Hey, I have received my set of MOO mini cards , thxxx foodbuzz they are soooo cute!!


moo cards1.JPG

Celebrating my 100th post with MOM'S SPECIAL MUTTON PICKLE

mutton pickle.jpg


I am so happy today, this is my 100th post, and what a ride it has been but I think I am happiest cooking and then blogging about it, really!


This pickle is one of my mom's signature dishes, (did I tell you she used to take cooking classes), it is a classic and is soooo delicious, anyone who tastes it once always keeps asking for more, it is Gagan's absolute favorite too and wins hands down over any other non-veg dish.


The pickle is spicy, sour and has a touch of Goan vindaloo style to it I think, it is full of flavor and is very good with paranthas and rice as well as on its own, it is actually my mom's secret recipe and it took a huge amount of coaxing and cajoling to get it out of her!


INGREDIENTS-


  • Boneless mutton-1 kg

  • Garlic-3 and a 1/2 whole heads peeled and ground to a paste

  • Mustard oil-1 cup

  • Red chillies whole-5

  • Black cardamom-5

  • Cinnamon sticks-3

  • Cloves-7

  • Cumin seeds-2 tbsp+1 tsp

  • Cayenne pepper(deggi mirch)-1 tbsp

  • Vinegar-1/2 to 3/4 cup

  • Salt to taste


Method-


With a sharp knife chop boneless mutton into bite size pieces, DO not wash the mutton, dry roast and grind all the dry masalas together except for red chillies, marinate mutton pieces in about half head of garlic and 1 tsp dry masala, leave for an hour.Now after an hour, heat oil in a pressure cooker add the cumin seeds and let crackle, next add the garlic paste, marinated mutton and all the rest of the ingredients except vinegar, dry roast the mutton for 5 minutes then close lid and give 4-5 whistles, let pressure drop by itself, DO not add any water.Open the lid and on medium flame dry roast the mutton, stirring all the time and adding vinegar little by little, till oil leaves sides of pan , add salt, keep frying till totally dry.


This pickle can be transferred to a clean container and will keep stored in the refrigerator for several weeks,IF it lasts that long!


mutton pickle1.jpg

TO-DIE-FOR TANDOORI CHICKEN

tandoori chicken.JPG


We Punjabi's are Tandoori Chicken freaks, you know papaji and tandoori chicken and peg-sheg :), all that!!! the association is so vivid haha!,so is the taste of this chicken, soft ,melt-in-the-mouth tender and sheer delight in every bite.Gagan loved it and declared it to be the best ever!


But after a hard day at work, do you really have the energy for making this kinda thing?, for this one- yessss, this is an incredibly easy way! the better part of the recipe can easily be done ahead of time, and from there on it hardly takes 15 minutes, I have a gas tandoor that I normally used for this, but that got too messy to clean up later, so I decided to adapt from David Lebovitz's Tandoori Chicken recipe, which turned out SOOOO beautifully!


INGREDIENTS-


  • Fresh chicken-1 (about 850 gms)

  • Thick yogurt-1 cup

  • Fresh cream-2 tbsp

  • Ginger paste-1 tbsp

  • Garlic paste-1 tbsp

  • Green chillies-2 ground

  • Garam masala-1 tsp

  • Lemon juice-1 tbsp

  • Salt to taste

  • a pinch of orange/red food colour

  • oil for shallow frying


Method-


Wash chicken under running water very well, leave in a colander to drain.With a sharp knife make deep cuts in the chicken flesh so that the marinate can penetrate, add all the other ingredients and season, mix well in a large bowl, cover with cling film and leave to marinate for at least 2 hours or overnight like in below pic.


marinating tandoori chicken.JPG


When you are ready to eat/serve, heat a heavy bottom pan and heat some oil for shallow frying, add the chicken pieces a few at a time, making sure that they are well coated with all that good marinade, fry for 15-20 minutes till golden and cooked through, serve with some onion salad and sprinkled with tangy chaat masala, oooh delicious!


tandoori chicken1.JPG


Last night after writing this post, I remembered an old joke by Khushwant Singh, here it goes...


A Sardarji was lying on the railway tracks with a bottle of whiskey and some tandoori chicken, a passerby was curious to see what is going on so he asked the Sardarji that what is he doing, the Sardarji replied that he was fed up of his life and was going to commit suicide,"But then why the bottle of whikey and tandoori chicken?", "I DONT WANT TO DIE OF STARVATION TILL THE TRAIN COMES",replied the Sardarji!!!!:):)

STEWED CHICKEN WITH FRESH VEGGIES-A Healthy fatfree Dinner!

stewed chicken with vegetables.jpg


I recently read somewhere-"The birth of my blog has been the death of my figure"!,how true is it?,I mean you cook and bake and...taste and taste...(just checking the salt mind you!) and before you even realize it, somewhere around 500 calories are consumed!!, I am on a health spree these days, go for an hours walk and try and eat as healthy as I possibly can.So for today's dinner I made this really fresh, comforting,easy and almost fat free stewed chicken with a zesty mustard sauce, note there is not a drop of oil or butter in the recipe, the chicken and vegetables cook in their own flavorful juices, hmmm no butter chicken for a few weeks I think:(


Here's the recipe...


  • Fresh chicken -1

  • Assorted fresh veggies-250 gms (I used beans, broccoli,carrots,peas,cauliflower..)

  • Mustard powder-1 tsp

  • Milk-1 tbsp

  • Toasted bread-acc. to preference

  • Fresh herbs-acc. to preference

  • Seasoning- salt and fresh black pepper


Method-Combine milk and mustard powder and leave to "mature" for about half an hour.Heat about 2 cups water in a heavy bottom pan, add cleaned chicken once the water reaches a boil.Chop veggies lengthwise add to the boiling chicken, cook for 15-20 mnutes till done and water dries up, add herbs and seasoning of choice.Top with mustard sauce and serve with toasted bread preferably wholewheat(notice it is not buttered), heyyy! indulge, it's fat free and really healthy!!


stewed chicken.jpg

HOMESTYLE CHICKEN CURRY

Once in a while I love to make something totally unpretentious, simple and earthy, in other words "homestyle", easy and full of wonderful flavours this delicious curry had every one asking for seconds, serve piping hot...it will definitely be more than welcome in this biting cold.
Ingredients- 
  • Chicken- 1 (cut into 12 pcs)cleaned and washed
  • Ground onions- 3 medium sized
  • Tomatoes pureed-3 medium sized
  • Bay leaves-2
  • Cloves-4
  • Cinnamon- 1 pc
  • Cardamom-2 crushed
  • Clarified butter(desi ghee)-2-3 tbsp
  • Whipped thick curd-1/2 cup
  • Ginger garlic paste-1 tbsp
  • Cumin seeds-1/2 tsp
  • Salt and pepper to taste
  • Coriander and green chillies to garnish
Method-
  1. Heat ghee, add all the whole spices and fry till fragrant.
  2. Add the ground onions and fry till brown stirring all the time
  3. Now add the tomatoes and ginger garlic till masala leaves side of the pan.
  4. Lastly add yogurt and the chicken, cover and cook till chicken is done, no need to add more water as chicken will leave water.
  5. Check if Chicken is done then season with salt and pepper , garnish with slit green chillies and coriander.Enjoy with hot paranthas, butter naans or rice!

KASHMIRI "DHANIWAL KORMA" (Lamb in a yogurt gravy garnished with coriander)

I have already acquainted you all with WAZWAN- Traditional Kashmiri Cuisine in this previous post and about basic recipes and ingredients in this one, and for all those who are visiting this blog for the first time ,I would just like to say that this Cuisine is unparalleled and the recipes are closely guarded secrets, here I have coaxed my mother- who learnt from the great Waza's (head chef's) herself during her stay in Kashmir to pass them to me as heirlooms!!!

Yes, that's how precious they are!!!!!

I can only just imagine how my mom , a shy young bride then, who had never set foot in the kitchen earlier would meticulously go about learning the nuances of a totally new culture and cuisine , and serve it up on the dinner table to a huge new family .... all for love!!

Now let's get down to cooking this heavenly mutton curry which is so very welcome in this freezing cold-

                          Dhaniwal Korma

                                             Kashmiri Dhaniwal Korma

Ingredients-

  • Leg of lamb- 1/2 kg (washed and cut into pieces)
  • Pure desi ghee- 1/2 cup
  • Cooked yogurt- 1 cup (find recipe for this here)
  • Turmeric- 1/2 teaspoon
  • Coriander powder-1 tsp.
  • Black pepper powder- 1/2 tsp.
  • Cloves- 3-4
  • Green cardamoms- 3-4
  • Saffron (zafran)- 1/4 tsp.
  • Onion- 1/2 cup (pureed)
  • Garlic- 1 tsp (ground)
  • Salt to taste
  • Cayenne pepper (deggi mirch)-1/2 tsp
  • Fresh coriander leaves- a handful

Method-

Heat ghee in a heavy bottom pan and add the onion and  the garlic and fry till onion turns golden brown , at this stage add the yogurt and all the spices (masalas) and fry very well till ghee separates, now add the lamb pieces and cook on a slow flame stirring frequently.The authentic recipe now calls for the mutton to be cooked, by adding hot water as required till it is tender (will take atleast an hour or more), for all of us hard pressed for time, can make use of the pressure cooker , simply add 3/4 cup HOT water to the cooker ,tip in the lamb which has been previously cooking in the yogurt mixture and give 5-6 whistles ,let pressure drop by itself, garnish with coriander leaves, serve hot with fragrant basmati rice or chapatis.                                       

SIZZLING LEMON CHICKEN

It's so very cold out here, so all I look for these days are quick winter-warming foods much like this Chicken recipe, which is  is a delight in all aspects and both me and my husband enjoy it very much,it has a lovely ginger-garlic infused, yogurt based masala and the fresh tang of lemons, an excellent snack with drinks.
lemon chicken
                             Sizzling Lemon Chicken
The key to really making delicious food is the freshness of ingredients,so make sure that you get the best and freshest possible always.
Ingredients-
  • Fresh chicken- 1 kg (small pieces)
  • Yogurt/fresh thick curd- 2 cups
  • Ginger-garlic paste-1 tsp
  • Cinnamon- few sticks
  • Cloves-2-3
  • Butter- 2 tbsp.
  • Fresh cilantro/coriander- a generous fistful
  • salt and pepper to taste
  • Lemon juice-2 tbsp
Method-
Melt the butter in a heavy skillet till bubbling, add the cinnamon and cloves as well as the ginger-garlic paste, saute for a few minutes ,next  add the chicken pieces and gently fry them till a light golden brown, add curd and transfer to a pressure cooker, put on heat , switch off the heat just before the whistle and immediately put the pressure cooker under running water to release steam.
Transfer again to the skillet and let all the juices dry up ,sprinkle lemon juice, garnish with the cilantro and some fresh lemon slices, serve hot and sizzling.
Info recommended by: Cooking and Cooking every day | Sponsored by: Cooking articles, Free cooking and Cooking today